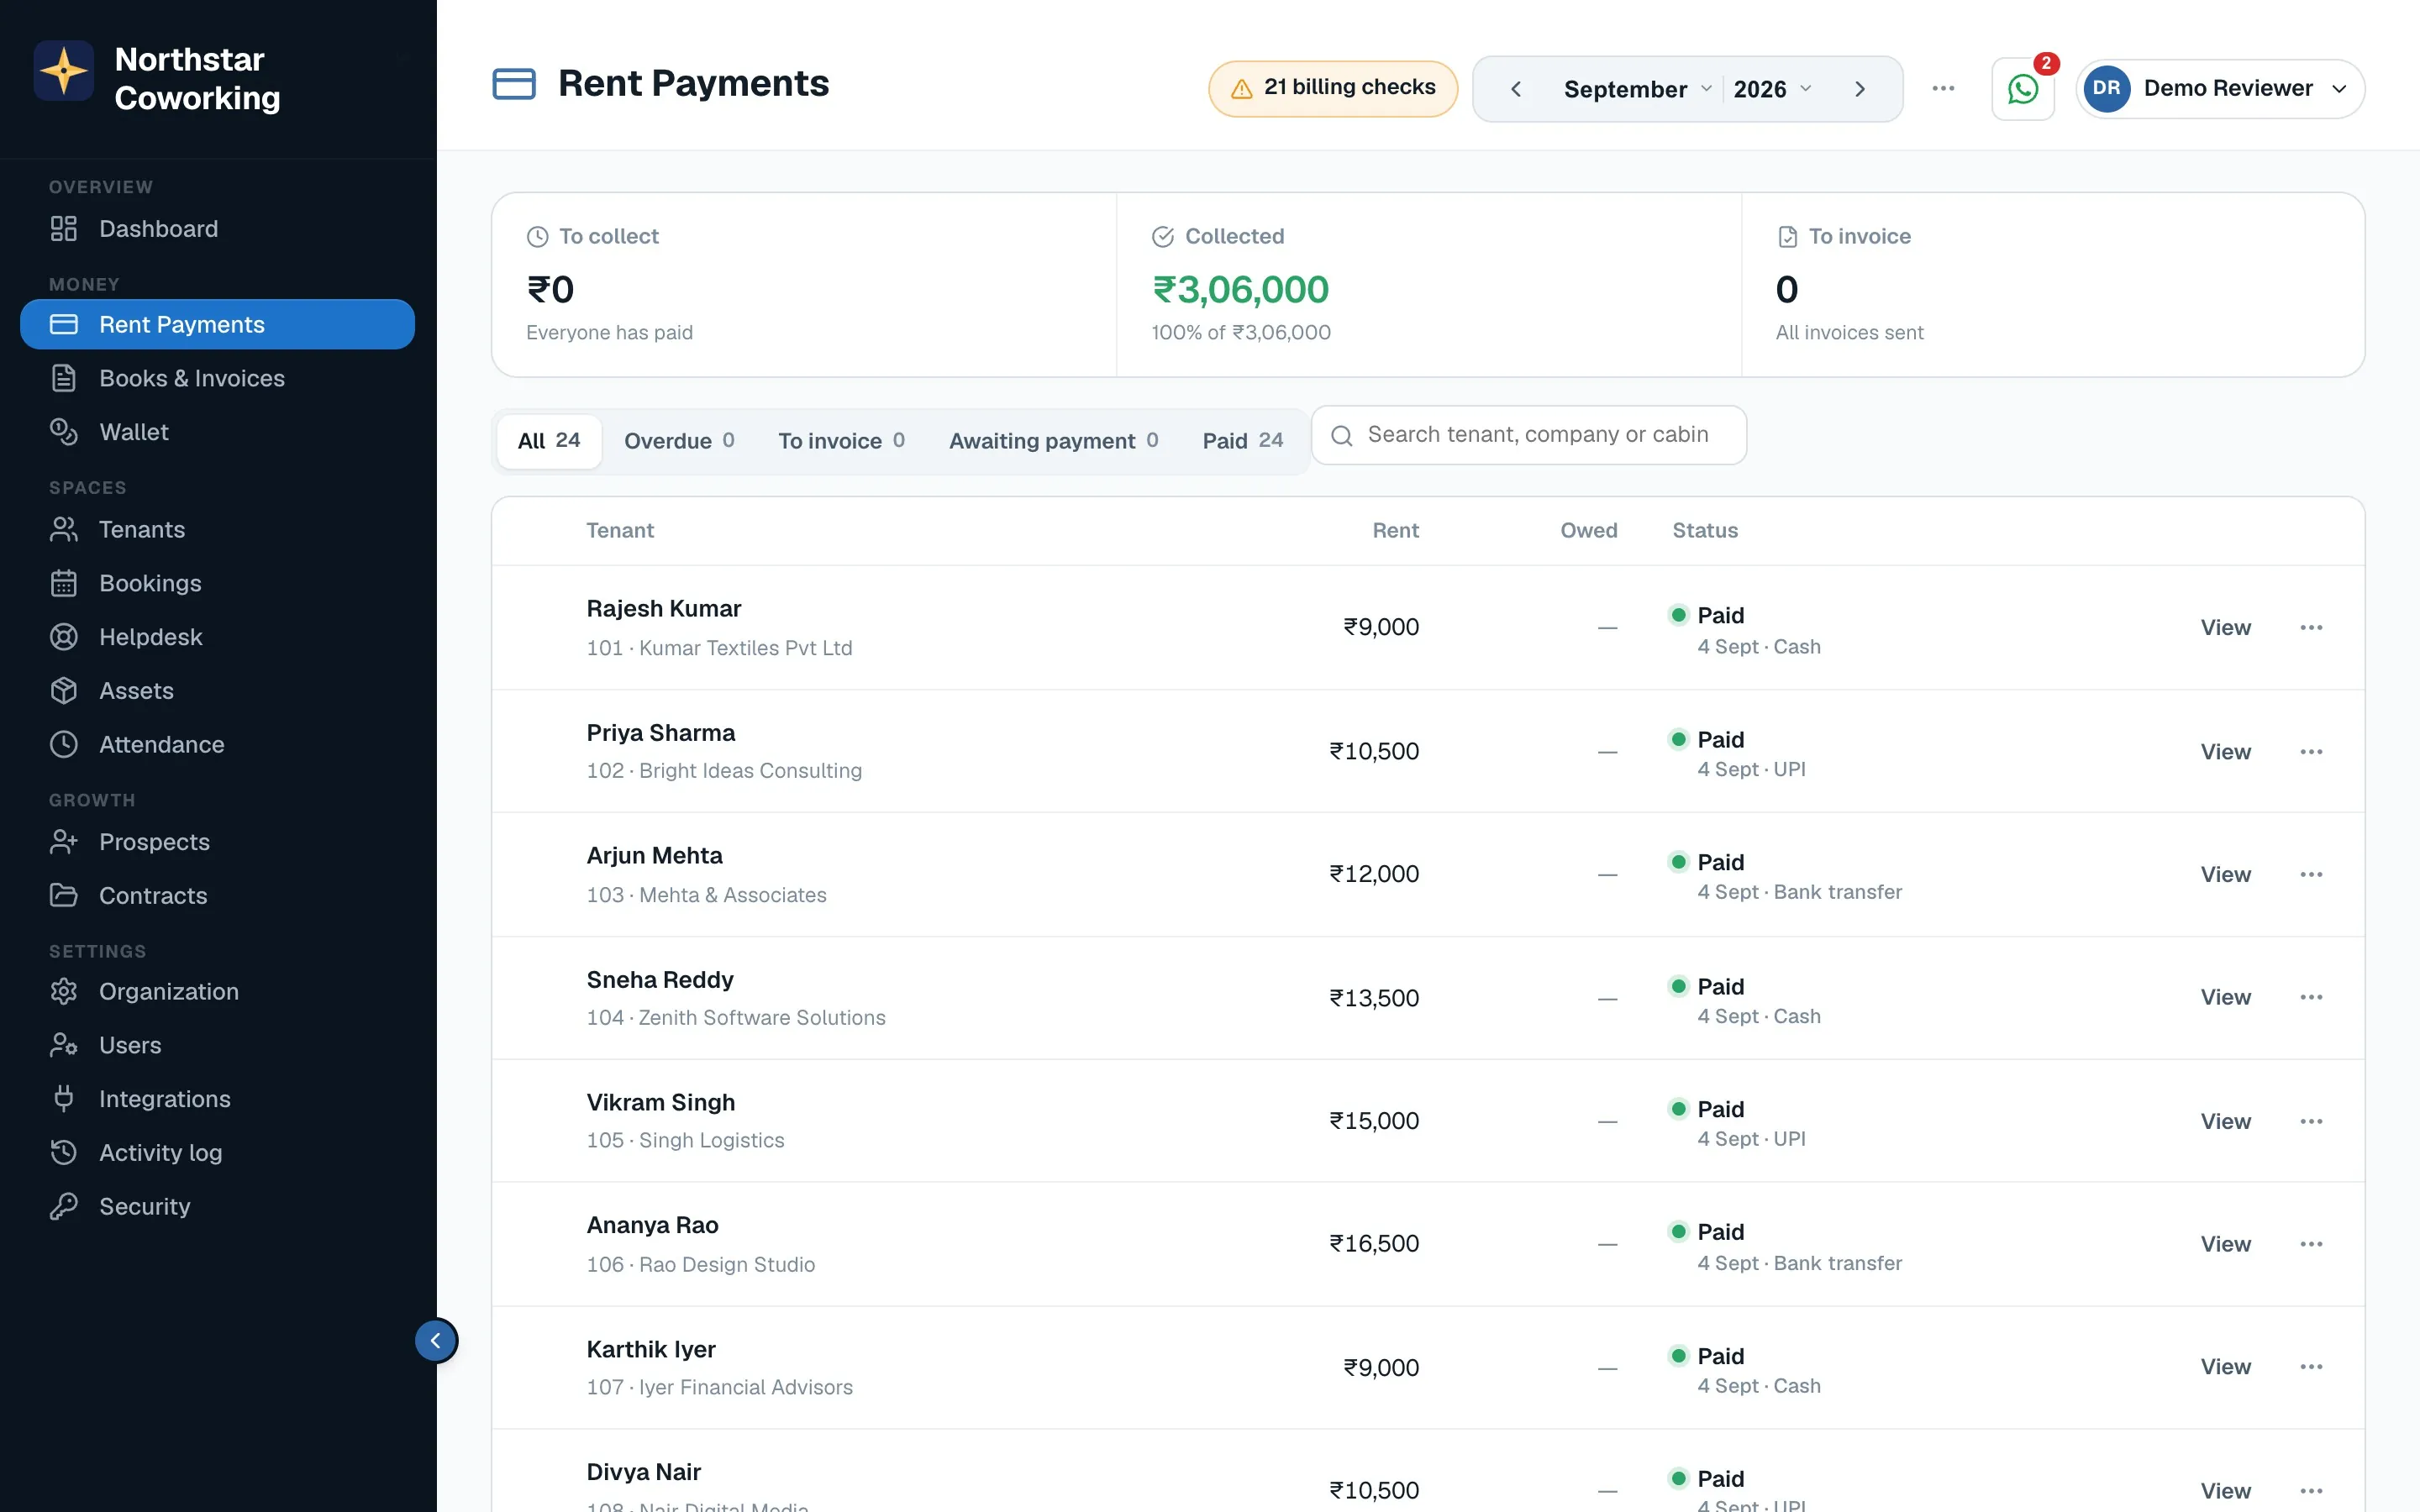
Open Rent Payments and find the tenant; use the search box or the Awaiting payment tab.
- Click Add payment on the tenant's row (the button appears once their invoice is sent).
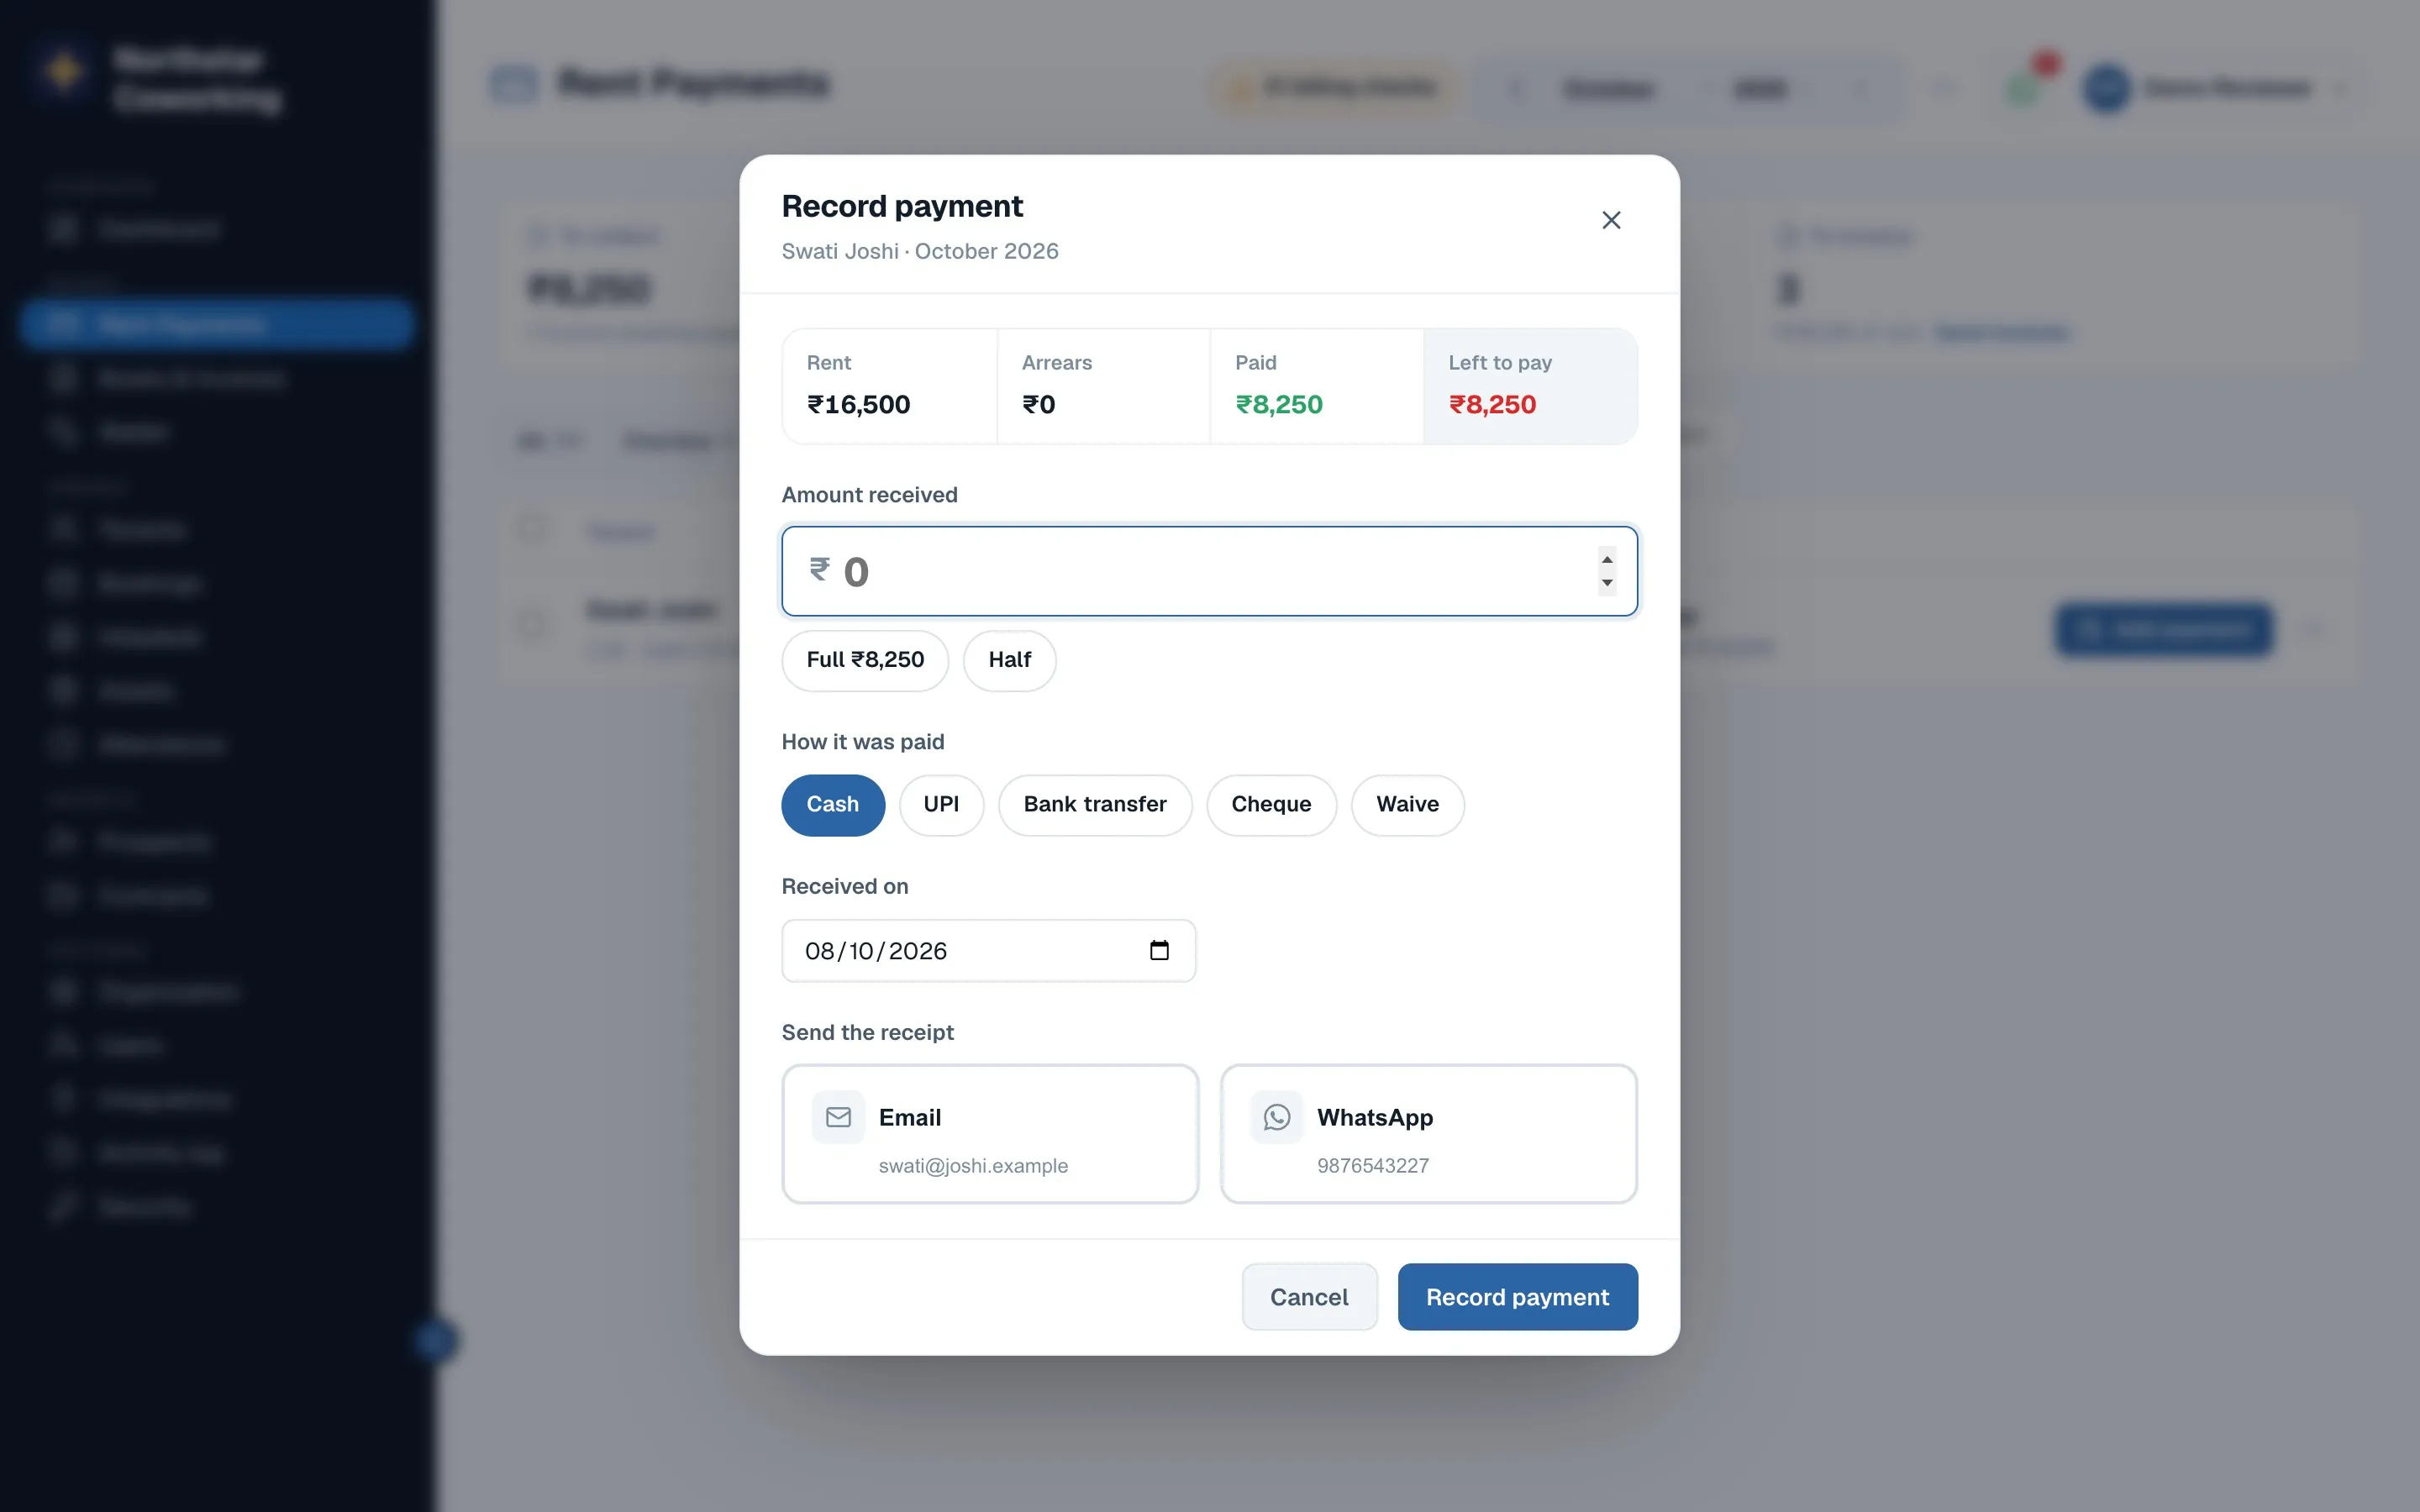
- Enter the amount. Quick amounts fill the full due in one tap; a part payment is fine too.
- Choose how it was paid (cash, UPI, cheque, bank transfer) and the bank account it went into.
- Add the reference (UTR, cheque number) and the date received.
- Save. The month shows Paid or Part paid, and the receipt is sent to the tenant on WhatsApp and email.
Special cases
- Paying for several months: tick the months the payment covers; the app splits it.
- Advance paid earlier: it is adjusted automatically and shown as 'Adjusted from Advance'.
- Waiving a month: use the waive option and give the reason; it is printed on the receipt and no money is recorded.
- Wrong entry: open the payment from the tenant's page and edit or delete it; the activity log keeps the history.
Online payments through the Pay Now link need nothing from you: they are marked paid by the gateway.
Related guides
Send the month's rent invoices →Remind everyone who hasn't paid →Receipts, invoices and statements →
Still stuck? WhatsApp us or write to info@coworkingos.in. Tell us the tenant or screen and we'll sort it with you.